How do I connect a windows PC to the CXA?
With the CXA switched to USB Audio Class 1, the CXA will work with Windows 7 or above and accept audio up to 24-bit/96kHz.
With the CXA switched to USB Audio Class 2, the CXA needs the Cambridge Audio USB Audio 2.0 Driver to be loaded and can then accept up to 32-bit/384kHz.
Our range of drivers can be downloaded from our Driver updates page
The default configuration is USB Audio Class 2.
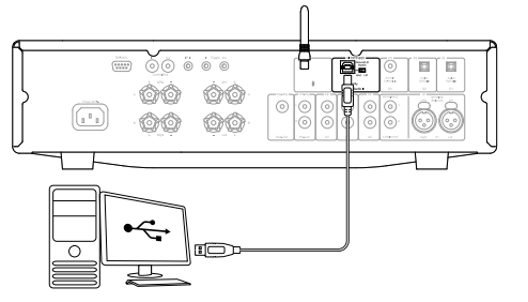
1. With the CXA in Standby mode and/or the volume set to minimum, connect your PC to the CXA via a USB A to B cable
2. For the highest quality play back, ensure that the CXA is set to USB 2.0 mode
See the ‘Setup Menu’ section in the manual or search for "setup usb audio 2" in this widget for a guide on how to change USB mode. (The default configuration is USB Audio Class 2).
3. Download the Windows USB 2.0 driver
See the “How do I install the latest USB Audio driver” section in the manual for a guide on how to download the USB driver.
You can download our latest Windows USB 2.0 driver here
4. Select the USB Audio source on the front panel of the CXA
You can do this by pressing the Bluetooth/USB button, which will toggle between the two inputs. The USB Audio is shown by the symbol being lit orange.
5. Choose the CXA as your output speaker via your Windows PC’s sound settings.
Note: To ensure you are getting the highest quality play back possible, ensure that the maximum sample rate for the CXA is selected, up to 384 kHz.
This can be done via your Windows PC by selecting ‘Control Panel’ > ‘Sound’ > ‘Speaker Properties’ > ‘Advanced’ Tab, and selecting the maximum sample rate and bit depth from the drop down menu.